
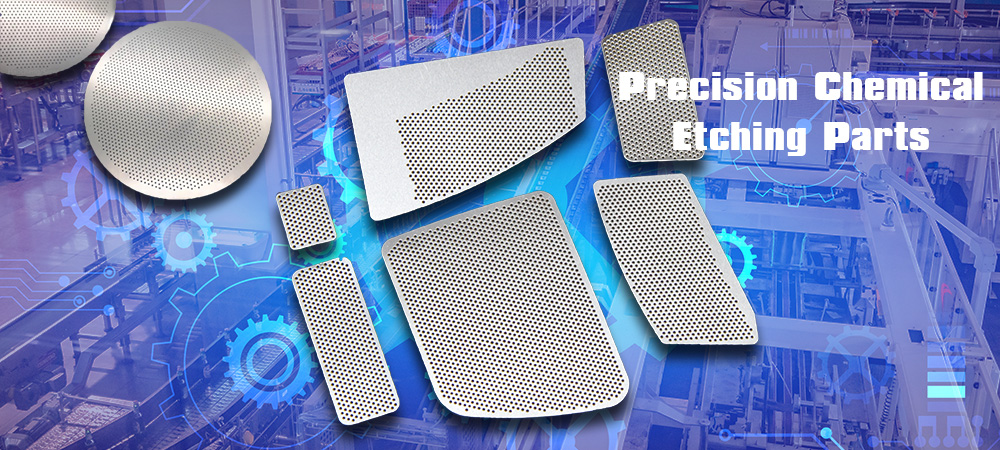
Specializes in this precise chemical etching process, which allows metal parts to be produced to very close tolerances using computer-aided design software, along with photography, chemistry, and metallurgy technologies. This cost-effective metal etching process allows us to quickly produce thin metal parts for many different applications.
Our photo etching process consists of the following steps
Step 1. Preparing design/Artwork for Chemical etching
Designs are submitted to us by customers, as a.DXF or. DWG file or AI; CDR format, or a drawing with which we create a photo tool. Mailed or e-mailed, the file is converted into the working photo tool our technicians use during every step in creating the final product. Adjustments and redesigns can be made quickly and cost-effectively by our experienced technicians.
Step 2. Chose right material
Next, the metals to be used in the project are selected. Materials can include copper alloys, stainless steel, aluminum alloys, or nickel alloys. Prior to chemical etching, the metal is cut into sheets and cleaned. Any oil, grease, or oxidation is removed from the metal sheet to be processed.
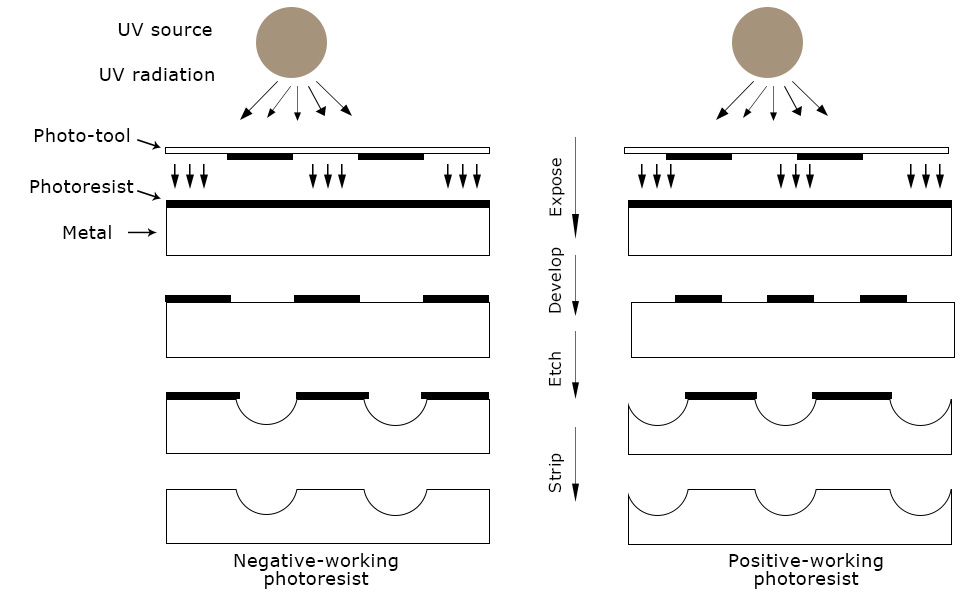
Step 3. Photoresist Coating
A photosensitive material is then applied to the sheet. Sensitive to light, and resistant to acids, the photoresist is applied using a specialized coating machine in our facility.
Step 4. UV Exposure
Once it is coated, the sheet is put into an exposure unit. It’s placed between two pieces of film, which have been designed based on the files submitted by the customer. The sheet is exposed to UV light on both sides. When light touches the resist it becomes hard or polymerized, and areas shaded from light remain soft.
Step 5. Development
During the development process, the soft resist is washed away, leaving behind the hard resist. Where the soft resist has been developed away, we are left with exposed material which will be dissolved away by the heated etchant. Areas with hardened resist will be protected from the etchant and become the parts desired.
Step 6. Chemical Etching
The etching process uses a range of etchants, depending on the base material used. Matching the appropriate chemicals ensures a more effective chemical machining process, in which etching metal is fast and effective.
Step 7. Photoresist Stripping
After etching the resist is completely removed, yielding the metal components the client has ordered and specified in the files they submitted.
Step 8. Final Inspection
Parts are then inspected, ensuring it meets proper dimensional specifications, meeting certain tolerance; is burr-free, and has no other imperfections or defects. We have well-trained QC staff by using professional QC machine to ensure every single piece is perfect before sending to our clients